
Perfecting Your Space: The Dos and Don’ts of Finishing Basement Walls
Whether you’re envisioning a stylish entertainment zone, a comfortable home office, or an inviting guest suite, the finishing touches on your basement walls play a pivotal role. However, as you delve into this home improvement venture, it’s crucial to tread carefully, avoiding common pitfalls and embracing best practices.
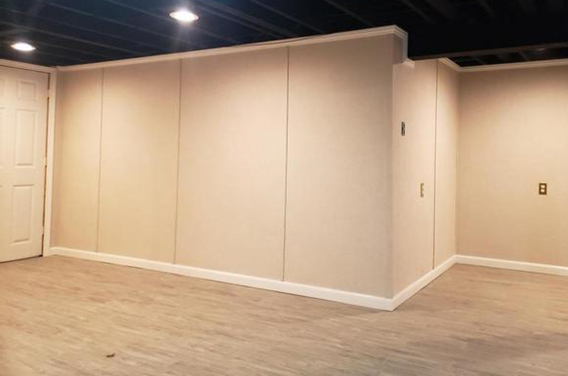
Dos and Don’ts of Finishing Basement Walls
In this guide, we’ll explore the do’s and don’ts of finishing basement walls to ensure that your basement remodel Arvada project not only meets your aesthetic aspirations but also stands the test of time.
Do Address Moisture Issues: A Dry Canvas is Key
Before you begin any finishing work, tackle any moisture issues in your basement. Moisture can lead to mold, mildew, and damage to your walls. Waterproofing solutions, proper drainage systems, and sealing any cracks are crucial steps in ensuring a dry and healthy environment. Invest time and effort into addressing moisture concerns to lay a solid foundation for your finished basement.
Don’t Skip the Insulation: A Cozy and Energy-Efficient Space
Insulating your basement walls is a crucial step in creating a comfortable and energy-efficient space. Insulation helps regulate temperature, keeping your basement warmer in winter and cooler in summer. Opt for moisture-resistant insulation materials, and don’t forget to insulate both exterior and interior walls. This investment not only enhances your comfort but also contributes to long-term energy savings.
Do Choose the Right Materials: Quality Matters
Selecting the right materials for finishing your basement walls is a key decision. Opt for moisture-resistant drywall or cement board to prevent water damage. Consider using mold-resistant paints and finishes to further safeguard against potential issues. Invest in quality materials that can withstand the unique conditions of a basement environment. While it might be tempting to cut costs, choosing durable materials ensures longevity and minimizes the risk of future problems.
Don’t Ignore Proper Ventilation: Airflow is Essential
Basements can be prone to poor ventilation, leading to musty odors and potential air quality issues. Integrate proper ventilation solutions into your finished basement plan. This might include installing vents, fans, or even a dehumidifier to keep the air circulating and prevent stagnation. Adequate ventilation not only contributes to a healthier environment but also helps control humidity, further protecting your finished walls from potential damage.
Do Plan for Access Points: Future-Proof Your Space
Anticipate the need for access points to utilities and potential repairs. While finishing your basement walls, consider creating removable panels or access doors to reach plumbing, electrical, or HVAC systems. This foresight ensures that any future maintenance or repairs won’t require tearing down your beautifully finished walls. Future-proofing your space adds a layer of practicality that can save you time, money, and headaches down the road.
Conclusion: Dos and Don’ts of Finishing Basement Walls
Finishing your basement walls is a transformative project that can turn a neglected space into a valuable extension of your home. With careful consideration of these do’s and don’ts, your finished basement can become the cozy, stylish, and functional oasis you’ve always dreamed of.
Pointers in Painting Cinder Block Walls
Cinder block walls, despite their functional and structural advantages, often lack visual appeal due to their gray, coarse surface. Painting is a popular solution to enhance their aesthetics, but the process requires some special considerations.

Pointers in Painting Cinder Block Walls
This article provides key pointers for painting cinder block wall effectively.
1. Check the Condition of the Wall:
Before you begin painting, thoroughly inspect the cinder block wall for any damage, such as cracks or moisture issues. Repair any damages before proceeding, as painting over these issues will only temporarily conceal them, not resolve them.
2. Clean the Wall:
Cinder blocks tend to be porous and can accumulate dust and dirt over time. Use a stiff-bristle brush to scrub the wall, followed by a rinse with a garden hose or power washer. Let the wall dry thoroughly, as excess moisture can prevent the paint from adhering properly.
3. Choose the Right Paint:
Due to the porous nature of cinder blocks, it’s crucial to use the right type of paint. An acrylic latex paint is an excellent choice for outdoor cinder block walls due to its durability and resistance to weather conditions. For indoor walls, you can use interior latex paint.
4. Use a Masonry Primer:
A masonry primer is crucial for painting cinder block walls. It helps seal the porous surface, provides a smooth base for the paint, and improves paint adhesion. Apply the primer using a thick nap roller, making sure to push the primer into the blocks’ pores and mortar lines. Allow the primer to dry as per the manufacturer’s instructions.
5. Apply Multiple Coats of Paint:
One coat of paint is rarely sufficient for cinder block walls. Applying multiple thin coats will provide a more even, durable finish than trying to cover the wall with one thick coat. Ensure the previous coat is completely dry before applying the next and use a roller to achieve a uniform texture.
6. Paint in the Right Weather (for Outdoor Walls):
If you’re painting an outdoor cinder block wall, keep an eye on the weather. Extreme temperatures or rainy weather can ruin a fresh coat of paint. The ideal conditions for painting are mild temperatures and overcast skies.
7. Take Care of Details:
While rollers can cover large areas quickly, they might not be effective in tight corners or around fixtures. Use a quality brush for these detailed areas to ensure complete coverage.
8. Prioritize Safety:
When painting, particularly outdoors or in high areas, safety should be paramount. Use a sturdy ladder or scaffolding, wear protective clothing, and take regular breaks to prevent fatigue.
9. Clean Up and Dispose of Paint Properly:
When you’ve finished painting, clean your brushes and rollers thoroughly for future use. If you have leftover paint, seal the can tightly to prevent it from drying out. Remember to dispose of any excess paint responsibly, adhering to local regulations.
Conclusion: Pointers in Painting Cinder Block Walls
Painting cinder block walls can greatly enhance their aesthetic appeal, but the process involves more than just slapping on a coat of paint. Proper preparation, the right materials, and careful application are essential for a durable, attractive finish. By following these pointers, you can transform your cinder block walls into a beautiful part of your home or yard.
Common Mistakes in Drywall Repair
Drywall is a standard component in modern construction for its affordability, versatility, and ease of installation. However, from time to time, it may require repairs due to dents, holes, or moisture damage.

Common Mistakes in Drywall Repair
While many homeowners choose to undertake drywall repair Lakewood CO as a DIY project, some common mistakes can lead to subpar results or even further damage. This article discusses these common errors and how to avoid them.
1. Ignoring the Underlying Issue:
One of the most common mistakes is treating the symptoms without addressing the cause. For example, if moisture damage causes drywall to deteriorate, merely patching the damaged area will be a temporary solution. The moisture issue must be resolved first to prevent recurring damage.
2. Using Incorrect Materials or Tools:
Using the wrong tools or materials can lead to poor results. Specific tasks require tools—for instance, a drywall saw for cutting out damaged sections and a taping knife for applying joint compound. Similarly, the type of joint compound used can significantly impact the repair. All-purpose joint compound is often the best choice for most drywall repairs.
3. Skimping on Surface Preparation:
Proper surface preparation is crucial in drywall repair. Failing to clean the area around the damage can cause new joint compounds to adhere poorly. Similarly, not properly sanding a patched area can lead to a noticeable bump in the wall.
4. Incorrect Application of Joint Compound:
The joint compound should be applied smoothly and evenly. Applying too much compound can create an uneven surface, while using too little might not effectively cover the repair. Also, failure to let each layer of compound dry fully before applying another can lead to a weak repair that might crack over time.
5. Not Using Tape:
Drywall tape is vital for preventing cracks in larger repairs. It reinforces the joint compound and ensures a smooth blend with the surrounding wall. Skipping this step can result in the joint compound cracking once it dries.
6. Poor Sanding Techniques:
Sanding is the final step to ensure a smooth, even repair that blends seamlessly with the rest of the wall. However, over-sanding can damage the surrounding drywall, while under-sanding can leave visible ridges or bumps.
7. Neglecting the Final Touches:
After the repair is complete and the surface is sanded smoothly, the wall should be primed before painting. Neglecting this step can lead to the paint absorbing unevenly, resulting in a visible patch.
8. Rushing the Process:
Drywall repair is a multistep process that takes time. Rushing through the stages—particularly the drying times between applying joint compound layers—can lead to shoddy results.
9. Not Calling a Professional When Needed:
While minor drywall repairs can be a DIY project, larger or more complicated repairs might require professional expertise. Attempting to fix significant damage without the necessary experience can result in further damage and increased repair costs.
Conclusion: Common Mistakes in Drywall Repair
While drywall repair might seem straightforward, it requires patience, the right tools and materials, and a methodical approach. By being aware of these common mistakes, you can ensure that your drywall repairs are seamless, effective, and durable, maintaining the aesthetics and integrity of your walls.
Ideas For Moving Out Cleaning
Moving out can be an arduous task, and the added responsibility of cleaning can make the process even more daunting. However, thorough cleaning is crucial when moving out, whether to secure your deposit in a rental or to prepare the property for the next residents.

Ideas For Moving Out Cleaning
This article provides innovative ideas to make the move out cleaning process easier and more efficient.
1. Plan and Make a Checklist:
Starting early is the key to stress-free moving out cleaning. A well-thought-out plan and a detailed checklist ensure that no area is overlooked. The list should include every room and all the tasks required for each, from dusting ceiling fans to scrubbing bathroom tiles.
2. Clean in a Strategic Order:
A common mistake during cleaning is moving haphazardly from one task to another. For efficiency, clean from top to bottom and left to right. This method ensures that any dust or debris knocked loose from higher surfaces can be cleaned up when you work on the lower areas.
3. Use Multipurpose Cleaners:
Rather than hauling around a bucket full of different cleaning products, consider using a multipurpose cleaner. It can be used on a wide variety of surfaces, saving both time and money. Always do a spot test on an inconspicuous area first to ensure the cleaner doesn’t cause discoloration.
4. Don’t Forget the Often-Overlooked Areas:
Certain areas, such as inside cabinets, window tracks, or behind appliances, often get overlooked. Pay special attention to these areas, as dirt accumulation here might be noticeable and affect your deposit or the home’s selling potential.
5. Invest in a Steam Cleaner:
For tough grime or stains, a steam cleaner can be an invaluable tool. Steam cleaners use hot, pressurized steam to loosen and remove dirt, making them particularly useful for cleaning tiles, ovens, or stained carpets.
6. Use Baking Soda and Vinegar for Stubborn Stains:
For stubborn stains, a mix of baking soda and vinegar can be a natural and effective cleaning solution. This combination is especially good for cleaning drains, removing hard water stains, and deodorizing surfaces.
7. Recruit Assistance:
Cleaning an entire house can be overwhelming for one person. Enlist help from friends or family to make the process quicker and less strenuous. Turn it into a fun event with music and food, and the work will feel much lighter.
8. Consider Hiring Professionals:
If you’re short on time or the idea of deep cleaning is too daunting, hiring professional cleaners can be a worthwhile investment. They have the necessary tools and experience to perform an efficient and thorough cleaning.
9. Don’t Forget the Exterior:
If you have a yard, patio, or exterior windows, don’t forget to clean these areas too. Sweep patios, clean out gutters, and wash exterior windows to improve the overall impression of your home.
10. Final Touches:
After the cleaning is complete, walk through the property one last time to check for any missed areas. Turn off all the lights, and make sure all windows and doors are locked.
Conclusion: Ideas for Moving Out Cleaning
A systematic approach to moving out cleaning can make the process much more manageable. Whether you choose to do it yourself or hire professionals, these ideas can help you ensure that you leave your old home as clean as possible, paving the way for a smooth move to your new abode.
Recent Comments